Cockpit Evaluation - A 20-minute assessment of your flying environment
By Ed Kolano (originally published in EAA Sport Aviation, June 2000)
In May we discussed flight control system freeplay and centering. Building on April’s introduction to flying qualities we showed how you interface with the airplane through its flight controls, which can affect the ease or difficulty of piloting tasks, and we gave specific measurement techniques and some practical "normal" flying assessment suggestions.
This month we continue with the pilot-airplane interface by stepping back from focused, component-level testing and exploring the entire cockpit environment. Our perspective is that of a pilot about to make a demo flight, which seems the perfect time to evaluate a cockpit, although it’s certainly not the only time. Try some of these tools in your airplane, and let us know what you discover.
The cockpit is your flying environment. You’ll spend 100 percent of your flying time in this little room, so it’s a good idea to make sure it’s a friendly place, since everything from instrument panel layout to seat comfort influences your flying enjoyment. Take a hard look at the cockpit and how you "fit" into it. Little less-than-desirable characteristics can become prolonged annoyances after a few dozen hours of flight time.
Once you climb aboard for your demo flight, you’re likely to be busy. That’s good, because you’ll want to evaluate the cockpit while performing typical piloting tasks. The drawback is that you can become so involved with flying the airplane that you forget to notice everything. If possible, spend about 20 minutes sitting in the pilot’s seat when the airplane is on the ground.
Ground Evaluation
Evaluating the cockpit on the ground gives you the time to become familiar with everything in it. Do this alone. If a salesperson or demo pilot wants to show you around the cockpit, fine, but you need time to assess the cockpit without distractions. Perhaps you can arrange to be left alone after the cockpit tour.
What do you do after you’ve climbed into the pilot’s seat? If you do nothing but sit there, you’ll have a better feel for seat comfort or lack thereof, but there are a lot of other things to check.
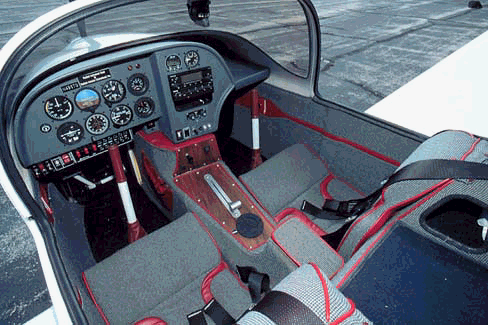
Long EZ
Cockpit entry. You performed the first assessment by getting in the airplane. If you and your passengers must climb on the wing to get into the cockpit, can you do it, or will you need to carry a step with you? Once on the wing, is getting a leg over the canopy sill difficult?
On some high-wing airplanes the cockpit doors are between landing gear and wing struts, necessitating some ducking and high-stepping for entry. Can you live with this? Sometimes getting in the door can be a challenge if the pilot’s seat is forward relative to the forward edge of the door, and you may have to pull your legs in with your hands. Getting out is usually easier, but don’t forget to evaluate this, too.
Shut the door or close the canopy and determine how easy it is to assess its security. Some airplanes have awkward locking mechanisms that can be difficult to check visually. When closed, does the door contact your shoulder or arm? After you’ve evaluated these things, unbutton the cockpit if it’s a warm day. There’s no reason you need to bake.
Adjust the seat. Can you place it where you want it for flying? If the seat slides fore and aft on tracks, adjust it to where you can displace the rudder pedals fully and actuate the wheel brakes and then strap yourself in, because that’s how you’ll spend the majority of your time in the cockpit. With the harness tightly cinched can you apply full forward stick? Can you pull the stick or yoke all the way back, or does it contact the seat or your belly? How about left and right stick? Do you have to move your leg to achieve full displacement? Can you do this while applying full rudder pedal?
If the seat is fixed (and the airplane doesn’t have adjustable rudder pedals) don’t assume you can modify this when you build your airplane. An immovable object like the wing spar may limit its adjustment. Be sure to ask about possible solutions if this is a concern. Try all other adjustments. Some airplanes have rudder pedals that adjust fore and aft. Other seats have seat-back tilt angle and/or seat-height adjustments. Experiment with them all to find your best location, then ask yourself if the best location is good enough.
Are you wearing the clothing you’ll wear when flying? Will bulky winter clothes affect your control displacement? Is there enough clearance between your head and the canopy or structural member to wear a headset or helmet? Will you wear a parachute? Is there a convenient place for your flight bag, charts, or lunch? What about your kneeboard?
Next, see how easily you can reach and actuate (or simulate actuating) all the levers and switches that control everything from the lights to the flaps and landing gear. Always keep safety in mind-do not actuate the landing gear retraction switch or lever! Before actuating any control that moves an external control surface, ensure that bystanders won’t be injured by your action.
Look at the instruments. Are they located where you plan to have yours? If not, inquire about space behind the panel to make sure they will fit. Can you read every instrument easily? Analog instruments located to your left or right may raise a parallax issue. Instruments with rotating indicators (needles) are designed to be observed directly head-on. When viewed from the side, the needle can appear to point at a different value.
How about glare? You’ll need a sunny day or overhead hangar lights to check this. Glare shields and instrument panel and windshield/ canopy angles affect this potentially annoying characteristic. With permission, turn on the displays (radios, engine monitors, etc.) and check their readability. If you intend to use digital instruments with LED or LCD displays whose readability is affected by ambient lighting conditions, discuss your concern with a company representative.
Look all around. How’s the view? Where are the blind spots? Can you see your wingtips for taxi clearance? How about the main wheels? Tail? Will you operate in congested areas where seeing these features will be necessary? You can’t do much about where these items are located, but taking a conscious look at their locations is good preparation for your flight.
Control Evaluation
Homebuilt aircraft have such a variety of control implementations, and if the airplane presents something new, you’ve probably come to grips with this already because unique flight control designs are hard not to notice during your demo flight preparation. Now it’s time to try the control system on for size.
You’ve already moved the flight controls through their full range of travel. Do it again, but this time think about flying the airplane. Will your "normal" stick and throttle hands grasp these controls in the airplane? The position of the stick/yoke and throttle determines this, and if they are opposite from what you’re used to, can you make the switch? Most pilots are remarkably adaptable and can become comfortable with different flight control arrangements after some practice. Are you one of these pilots?
Which hand? If you think you can switch hands to use your favorite hand-except during takeoff and in the landing pattern, where you want immediate control of both stick and throttle-think about it again. This technique is certainly possible, but it can lead to trouble. If caught by surprise with the wrong hand on the stick, you lose precious seconds-and jeopardize control while switching hands.
Side stick. These little control sticks can provide a fighter-like feel to your airplane. They are fun to fly but generally preclude using your other hand at all. If you plan to fly your airplane IFR and write with your stick hand, you’ll have to release the control altogether to copy clearances, frequencies, etc.
Stick length. Generally, longer sticks have larger displacements than shorter sticks. Longer sticks give you a mechanical advantage that helps keep forces manageable, but they require a longer reach. Because of the larger displacement, the designer can fine tune stick sensitivity. Short sticks provide the same control authority, but they do it with less displacement. This can mean higher stick forces or an overly sensitive feel, which means small stick displacements generate comparatively quick airplane pitch or roll responses. The demo flight is the best time to determine whether these concerns are valid.
Stick operating mechanism. Some sticks pivot traditionally. Others have different pivot points for roll and pitch. Some slide instead of pivot, others slide for one axis and pivot for the other, and some sticks are not vertical during straight and level flight.
Single or dual controls. Do you need a full set of dual controls, or will a single set suffice? Some side-by-side airplanes have a single stick between the seats. On some center-stick airplanes the only throttle is on the left, out of the right-seater’s reach, and others have dual throttles located outboard. If you plan to fly from either seat, you’ll have to become ambidextrous. Don’t forget to consider rudder pedals and brakes for the other seat if you plan to share the flying.
Rudder pedals. Traditional rudder pedals move fore and aft, remaining square to the pilot’s feet. Others are little more than a pivoting bar that angles away from the outside of the pilot’s foot as it moves forward. Some airplanes have heel cups that force the pilot to displace the pedals by ankle articulation instead of by moving his entire leg.
Wheel brakes. Toe brakes are the norm in production airplanes and many homebuilts, but some airplanes have heel brakes. Check the location relative to your normal foot position. Can you operate the rudder pedals and both brakes easily?
A few homebuilts have a hand brake that operates both main-wheel brakes at the same time. Is it easily accessible? Is it near the throttle (presumably you’ll be using your throttle hand to actuate the hand brake)? Can you apply full brakes without interference, or must you contort your arm?
Several canard designs don’t have separate brake pedals-you actuate the brakes by further displacement of the rudder pedals after reaching full rudder deflection. Don’t forget to allow for enough leg extension to operate the brakes when adjusting the seat.
Flaps. If electrically operated, is the switch conveniently located? Is there a flap position indicator and can you easily read it? Is the flap circuit breaker easily accessible in the event of a runaway? If mechanically operated, where’s the flap lever? Lower and raise the flaps to see how far the lever travels and whether moving it requires any special body contortions. Does the lever interfere with normal piloting tasks in any position?
Engine controls. Can you easily reach and operate the throttle, propeller, and mixture controls? Quadrant or push-pull? Vernier control or friction lock? If permissible, actuate them all. You may be able to substitute other styles in your airplane (ask a company rep), but try them.
Other controls. If the demo airplane incorporates any other controls, evaluate them. Cowl flaps, oil cooler doors, tailwheel locking devices, etc., fall into this category.
Adding to the List
Ensure that you evaluate everything you can see or think of. Here are a few more items for your consideration. Feel free to add to this list; it is not all-inclusive.
Fuel system. Can you see and operate the fuel selector while strapped in? What about the fuel boost pump switch? Are there fuel quantity gauges, or must you squint at a sight tube through a mirror? Can you quickly and accurately determine the fuel remaining?
Electrical system. Evaluate the location of the master switch, circuit breakers, avionics, and other electrical devices, switches, and instrumentation. Can you quickly secure the master in the event of an electrical fire? How about pulling circuit breakers? Are switches that control different devices located near each other and of similar shape? If so, what would be the consequences of inadvertently throwing the wrong switch? This may not be significant during a demo flight, but note any personal discrepancies so you can remedy them when you design your cockpit interior.
Emergency Exit. In an emergency, can you and your passengers exit the cockpit in a hurry? Can you open the hatch quickly with one hand? Can you do it with your eyes closed? Can you get out with your parachute on and without having to slide the seat back or execute other pre-evacuation procedures?
Harness. Is it effective? You’ll be better able to answer this question after your flight, but think about it now. Is it a two-point harness? Three? Four? Five? If not, are there potential attachment points for modification to suit you? Are the belts comfortable? Can you stow them easily so they don’t lodge where they don’t belong or dangle out the door?
As you perform all these suggested evaluations individually, remember that this is not how you’ll fly your airplane. During a normal flight many things happen simultaneously and sequentially, and the synergistic result can be different from the isolated assessment. You can overcome this by simulating various flying tasks. Perform a mock takeoff, moving the throttle and flight controls and scanning the instruments as you normally would.
Simulate airway navigation if that’s how you intend to fly your airplane. Copy a clearance on your kneeboard, change the radio frequency, and fiddle with the GPS. If you have to switch stick hands to accomplish these tasks, switch hands in the simulation. Get out an approach plate. Where will you put it? If you are a flightseer, can you look around outside without shifting your body or leaning your head? If you shift, do you make inadvertent control inputs in the process?
Come in for a landing. Lower the flaps as you normally would. Slide your eyes left and right to see what a crabbed approach would look like. Pull the stick back to flare. Compensate for a slight balloon while closing the throttle and working the rudder and ailerons. Grease it on the runway, but don’t stop flying yet. Handle the crosswind; track the centerline all the way to a stop.
Notice Anything New?
You have just spent around a half-hour in the pilot’s seat. How’s your butt? Your back? Neck? If you are experiencing any discomfort now, it will probably be worse on a long flight. Track down the source of your discomfort and ask the company what you can do about it on your airplane.
Next month we’ll explore your flight test program. The focus will be the first flight in your newly completed homebuilt or restoration. Whether you intend to make this flight or have someone else fly the plane for you, you’ll find next month’s Test Pilot packed full of useful information.
