Spark Plug Hole Thread Repair Using TIME-SERT Inserts
By J. Davis, EAA 588164
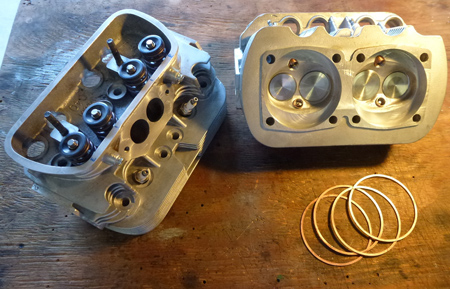
November 2015 - Several weeks ago, I got an unexpected opportunity to learn a new skill. As I approached the first start of my newly assembled AeroConversions/AeroVee engine installation in my Sonex, I had finger-tightened all plugs and, as I was snugging up the spark plugs prior to torquing, applying maybe 2 pounds of torque, one of the plugs just started spinning. Not good! One plug on the other head did the same. It was as if the threads cut into the aluminum head were so shallow they couldn’t grip the plug. AeroConversions purchases these heads from a third party VW parts supplier, Mofoco, which uses its machine shop to drill and tap a second plug hole per combustion chamber. Explaining the issue to Sonex, I was told that they were aware of a range of heads that had substandard machining of the spark plug holes due to “worn out tooling.” That would have been an interesting bit of information to have six months ago! Sonex said that I could exchange the bad heads for new ones or, alternatively, I could elect to repair the threads using TIME-SERT inserts, and they would credit me the cost of the repair kit and inserts (approximately $200 Canadian). I decided to be proactive and install TIME-SERTS for all eight plugs, not just the substandard ones. About a week later, the Purolator truck stopped by with my repair kit.
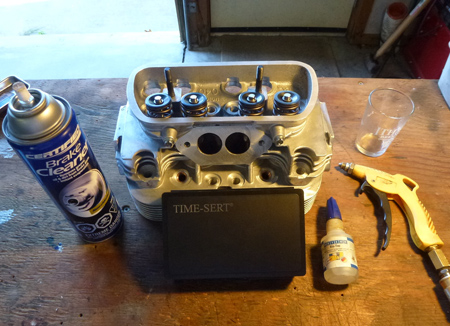
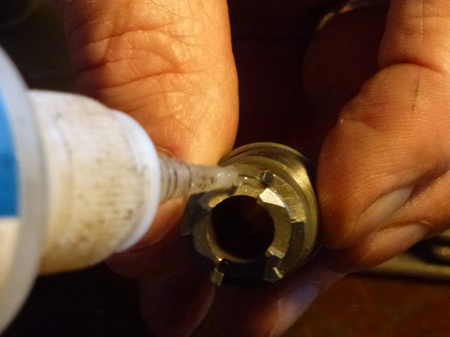
The TIME-SERT repair kit and supplies needed.
The repair kit consists of a special stepped tap (12 mm by 1.25 in my case), a dual seat cutter, an insert installation tool, special tool handle, and the actual inserts (specifically sized based on the reach of the spark plug, in my case, 17.5 mm).

Repair kit contents.
The included instructions are clear and straightforward:
- tap the new threads
- cut the seats—one for the insert’s shoulder, one for the plug washer
- install the insert
Here’s how it went for me:
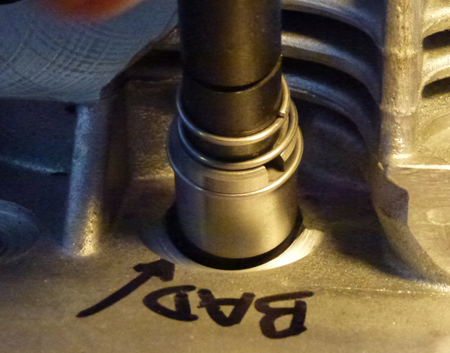
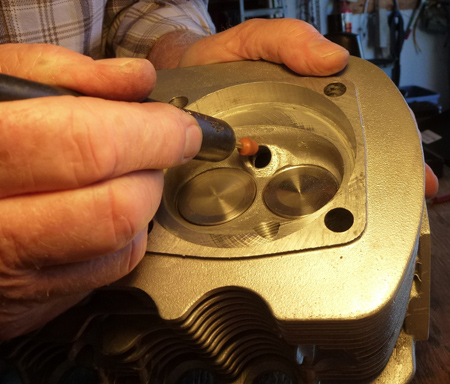
The tap is stepped. The first section is 12 by 1.5 mm, so that it threads into the original spark plug hole. In my case, the bad holes were never cross-threaded, so the tap screwed in easily, perfectly aligned. Once the first step is threaded in, the second step actually cuts the new threads for the inserts. After lubricating the tap with cutting fluid, a dozen or so turns of the handle are sufficient to complete the threading operation.
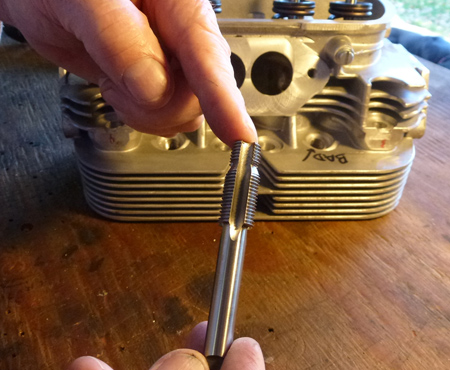
Special stepped tap makes alignment automatic.
Using the tee handle to turn the tap.
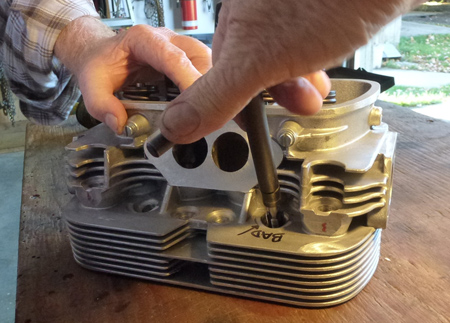
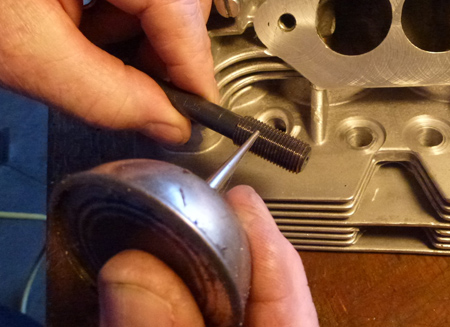
The tap is left in place and acts as a guide for step two, the seat cutter.
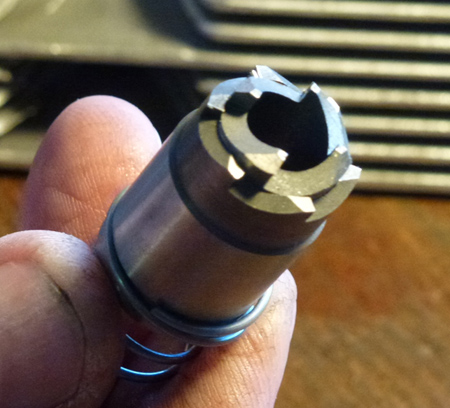
The seat cutter.
Cutting fluid applied.
This insures that the seats are cut square to the hole, and a couple dozen half-turns accomplish the job.
Cutting the seats.
TIME-SERT suggests that their inserts can be installed without removing the heads, by greasing the tap, but after seeing the pile of metal shavings produced, I would not really suggest that!
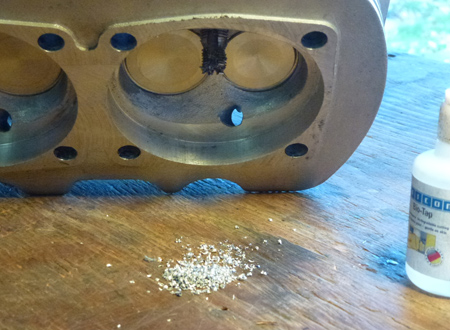
Aluminum shavings produced.
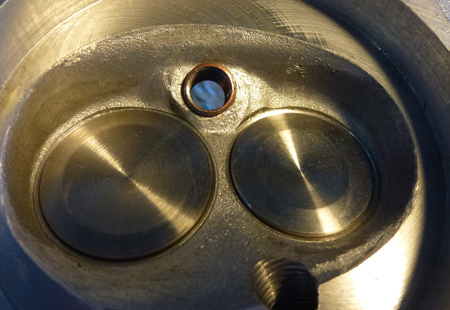
There is now a recessed seat for the insert shoulder, as well as a recessed seat for the plug washer/gasket to sit in…a nice touch.
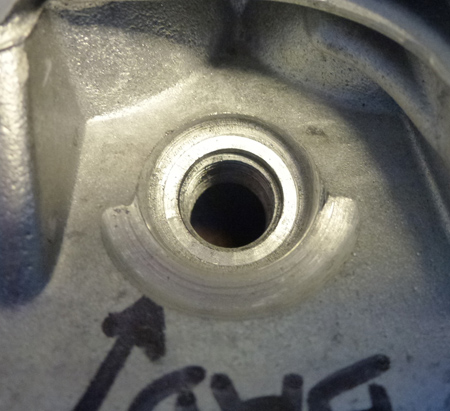
Closeup of the machined seats.
At this point, the seat cutter and step tap are removed, and the hole cleaned and dried to accept the insert. I used my trusty Dremel tool to deburr and smooth any imperfections left by the tapping operation (or the original casting, for that matter).
Deburring and polishing.
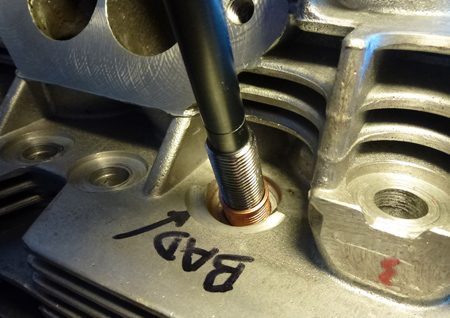
After cleaning and drying the new threads (I used Q-tips and acetone), the insert is screwed on to the end of the special tool and started into the newly threaded hole. After lubricating the tool’s threads (not the insert’s) with 30 motor oil, the tool is turned until a noticeable resistance is felt. After a couple more turns, this resistance disappears, and the insert is properly installed. I believe that the name TIME-SERT refers to the “timing” of the machined threads to the insert’s threads, effectively locking the insert in place.
Oiling the insertion tool.
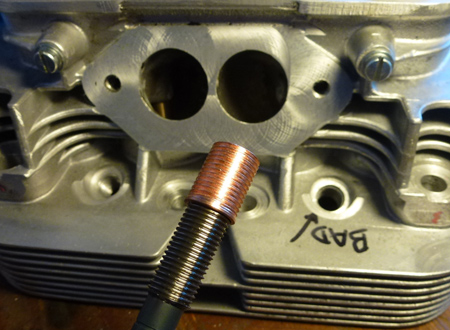
The insert started onto the tool.
The insert started into hole.
Closeup of newly installed insert.
That’s it! I just needed to repeat the process seven more times. I’m extremely happy with the result, and I’m confident that these modified spark plug holes are robust and far superior to holes [sloppily] machined straight into the aluminum heads!
Done!
