How to Build an Airplane
April 2018 - When I mention to someone outside of our aviation world that I built my own aircraft and that I enjoy flying cross-country in it, it always seems to strike them as incredible. Then when I tell them that they too could build an aircraft, this seems even more incredible to them. Even when I mention that you start with a kit and simply put items together until the conglomeration begins to resemble an aircraft, they seem incredulous.
So how do you learn the knowledge and gain the skills needed for such a project? Let me take you through an EAA SportAir Workshop on Sheet Metal Building Basics that I taught last weekend.
For a number of years, EAA has offered skill-developing workshops around North America. March 17-18, a set of these workshops were held at the Aviation Institute of Maintenance - San Francisco Bay, California - Metro campus in Oakland, California.
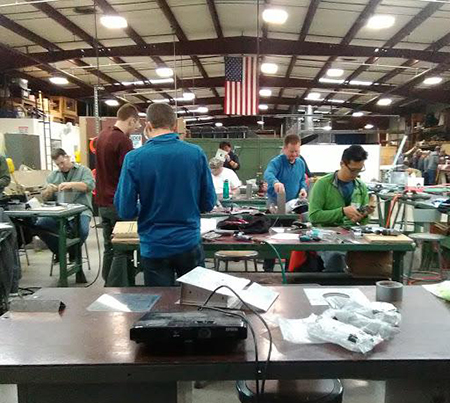
We started out with a large group of students assembled in a general holding area of this campus at 7:30 a.m. on Saturday. After some coffee, cookies, and general instructions we broke up into separate classes. Four courses were offered: Composite Construction, taught by Scott VanderVeen, EAA 677456; Fabric Covering, taught by Nate Hammond, EAA 1193485; Electrics/Avionics, taught by Dick Koehler, EAA 161427, and Sheet Metal Building, taught by me.
Courses are capped at 16 students, which allows individual handholding as necessary. Naturally, my class had 17 students due to some mix-up in last minute registrations.
We spent the first 15 minutes or so introducing ourselves and just getting a feel for each other, breaking the inevitable ice when strangers are first put together in a classroom setting, and then I explained the general structure of the course. Because sheet metal work requires a bit of descriptive work with a subsequent knowledge base, I spent time describing products, procedures, specialized tools, etc. This was enhanced with a PowerPoint presentation on different kinds of aircraft construction methods and how sheet metal components are found on all aircraft types. We covered aluminum alloys, manufactured aluminum forms, appropriate fasteners, the various tools, and then proceeded to specific methods of constructing sheet metal components. This took us to about midmorning of the first day.
Each student is supplied with a set of basic sheet metal tools, and we spent an additional half an hour inventorying these tools to ensure that each student had a full complement, together with a simple explanation of each tool and its purpose.
Now let the fun begin! The students were introduced to a practice project that is designed to enable the students to:
- Recognize and identify a number of component parts and fastening devices.
- Read and understand drawings.
- Identify the specified preparatory procedures for each component and fastener, both universal head and flush head rivets.
- Lay out rivet patterns.
- Drill, deburr, dimple, and countersink.
- Rivet using both a rivet squeezer as well as a rivet gun and bucking bar.
Since most students had no experience in anything like this, I explained that the object was to understand the concepts and not to worry about aesthetics. Most of these practice projects turn out really ugly!
By this time the students are really into their work. This represents a very steep learning curve. By about 2 p.m. most of these practice projects were completed, and it was time to evaluate. We discussed the following:
Which is easier:
- To dimple or to countersink?
- To drive universal or flush rivets?
- To use the rivet squeezer or the rivet gun with bucking bar?
- Did anyone have problems with distortion? Why?
- Is it important to mark components so that you know how they fit back together?
It is amazing how much is learned by this simple practice project, and the students find themselves fully engaged. It never fails to amaze how much fun a couple of pieces of aluminum and a couple of rivets can create!
Now the pièce de résistance, a simulated wing-construction project. Students are issued a kit consisting of a number of components that they will individually prepare to fit together to build a complex wing (of course in a smaller simulation). They will start by forming two ribs using forming blocks, then will identify a forward and rear spar and fit and rivet these components together. Next they will prepare an upper skin with a stiffener, and rivet this to their rib and spar framework. But before they rivet this they will have to ensure that alignment and symmetry are okay and check issues like edge distance for rivet locations and rivet spacing. Also, a piano hinge needs to be riveted to the trailing edge to which a trim tab will be mounted later in the project. The upper (top) skin is fitted to the framework with flush rivets so the components need to be dimpled and then riveted. Because all the rivets are around the outside of the project, these rivets can be set with the rivet squeezer (usually the easier process).
This will pretty much conclude the first day’s lessons. Believe me, by 5 p.m. the students (and, may I say, the instructor) are zonked!
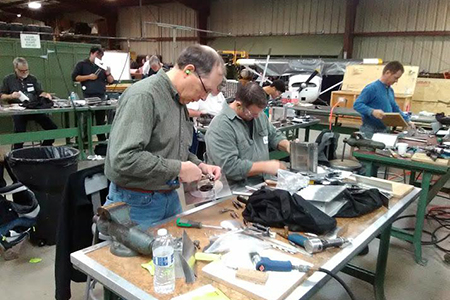
Students hard at work.
Day two again began with a presentation, and we cover additional subjects such as corrosion protection systems, fatigue issues, and specialized tools.
Then we get back to the wing project. Now the students start working on the bottom skin. This requires careful evaluation of the design plans because the lower skin is fitted with an access cover that requires three components: the skin, a doubler, and the access cover. In addition, students learn how to prepare and install rivnuts onto the doubler to which the access cover is fitted.
The lower (bottom) skin fitting to the framework calls for universal (round headed) rivets, and although the student can set the peripheral rivets with the rivet squeezer, the doubler inside the skin requires the student to use the rivet gun and bucking bar because these rivets can’t be reached with the rivet squeezer. Since this requires one hand holding the rivet gun, one the bucking bar, and a third stabilizing the work piece, students quickly learn to either work together or properly clamp their work if they want to do a professional job (read don’t want their work to be destroyed by errant strikes of the rivet gun).
Now the trim tab. Until this point, all components have been symmetrical. However, the trim tab can only go one way. Usually at least one student gets things wrong. When my wife and I were building our RV-9 we had a saying that we could always find the correct information after we had made the error! The students assemble the piano hinge to the trim tab using blind (pulled) rivets. Then it’s simply assembling the piano hinge and presto success! Finish!
The students inventory their tools placing them back into their tool bags, clean up their work area, and bring their completed wing project to me for a careful evaluation. It always surprises me how well these projects turn out. The students, who only a few hours ago held up a really ugly practice project, are equally amazed. In my evaluation I overlook slight aesthetic defects but concentrate on structural integrity, and if the student carefully followed directions. Each student will set his or her own bar, which will increasingly raise higher and higher throughout future construction projects.
Finally, I ask the students to fill out an evaluation sheet that gives us at EAA an indication of how well the course went and was received. Here are some actual comments:
“Awesome, learned an immense amount. Makes me want to sell my 182 and start building immediately — 5 stars.” Steven
“Excellent! Exceeded my expectations. Great instructor — 5 stars.” Tom
“Excellent workshop! Great balance of info/speed and class/hands-on — 5 stars.” Johnathon
“I learned an incredible amount. It was a challenging but fun experience. The pace was pretty fast in the later part of both days. But with so much material and productivity there is no way around that. It was most enjoyable meeting everyone — 5 stars.” Pat
So, is there an EAA Canada SportAir Workshop in your future? Courses are scheduled for April 28 and 29 in High River, Alberta, and include:
- Sheet Metal and RV Assembly
- Composite Construction
- What’s Involved in Homebuilding Your Aircraft in Canada
- How to Test-fly your Homebuilt Aircraft
- Annual Inspection of Your Homebuilt
Contact eaasportaircanada@gmail.com or call 403-614-6142 for more information or go to http://www.eaasportaircanada.ca/ to register.
